How to add a logo watermark to a video with Claude MCP and Medux

Use Claude and Medux through MCP to place a logo watermark on a video and export a branded MP4. This guide keeps file roles and constraints in context, reviews the proposed call, and validates the returned result.

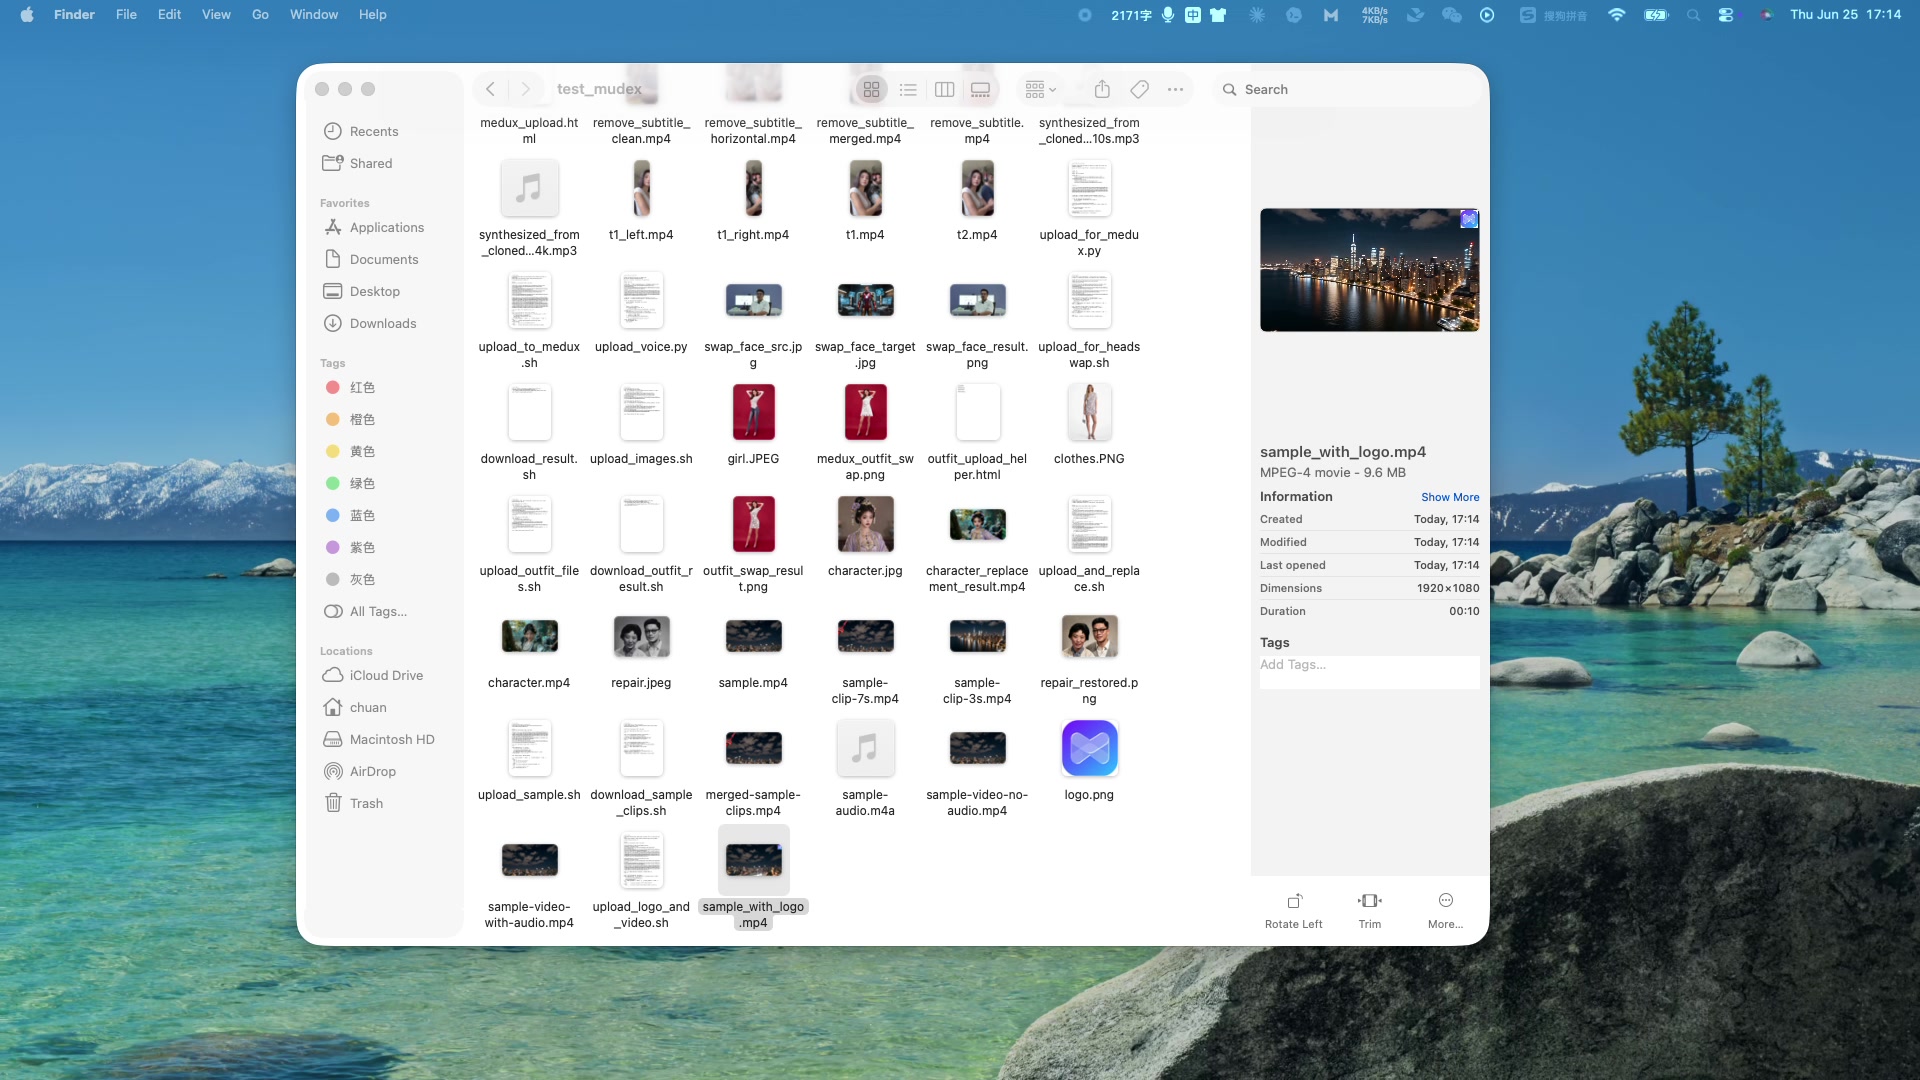
Final video preview with a logo watermark in the top-right corner
Final output: the logo is resized and placed in the top-right corner while the original video remains intact.

Claude-specific workflow

Run Add a Logo Watermark to Video as a Claude MCP workflow

Keep the goal, source assets, and constraints together in the conversation. Ask Claude to restate the source video, logo image, placement, scale, and opacity before proposing the Medux video watermark tool. That context checkpoint makes the file roles and desired outcome easy to correct before any Medux call is approved.

Claude prompt pattern

Using the assets and requirements in this conversation, help me add a logo watermark to a video with Medux MCP.
Restate which input fulfills each role: the source video, logo image, placement, scale, and opacity.
Propose the the Medux video watermark tool call and summarize its arguments before asking for approval.
When it finishes, return the branded MP4 with a checklist confirming that the logo position, size, opacity, duration, and video playback are correct.

Context checkpoint

Have Claude summarize the intended transformation, identify every source asset by role, and list the important constraints. Review that summary together with the proposed tool arguments; correct the conversation first if a file, order, time range, or setting is ambiguous.

Result verification

Keep the Medux task ID in the conversation while Claude checks progress. When processing ends, ask for the branded MP4 plus a concise validation checklist confirming that the logo position, size, opacity, duration, and video playback are correct.

Before you start

Prepare two local files

Source videoExample: sample.mp4
Logo imageExample: logo.png, ideally with transparency
Connection requirement: Claude must have the Medux MCP connector enabled. The video shows the medux connector available in Claude's context panel.

Core workflow

01

Describe the result in one prompt

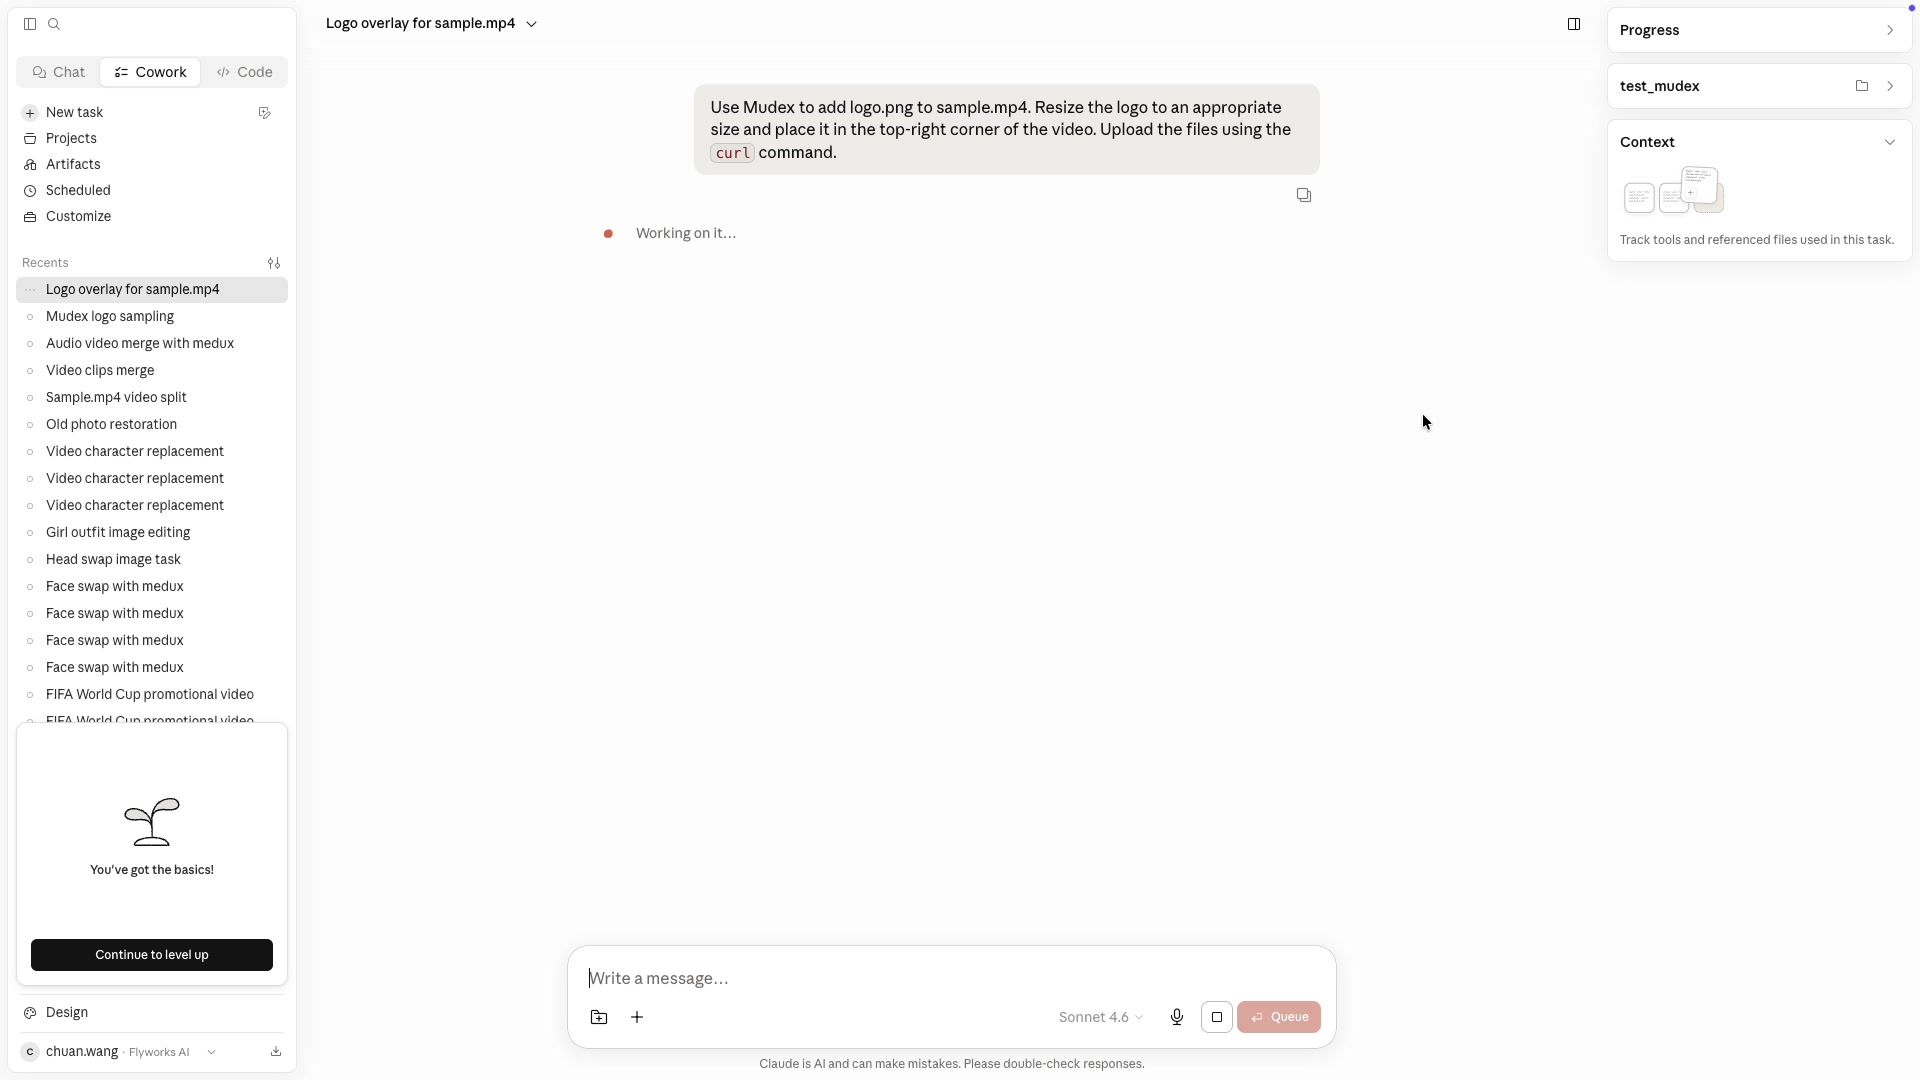
Tell Claude which files to use, where the watermark should appear, and how uploads should be handled. In the demonstrated workflow, the logo is placed in the top-right corner.

Prompt used in Claude

Use Medux to add logo.png to sample.mp4.
Resize the logo to an appropriate size and place it
in the top-right corner of the video.
Upload the files using the curl command.

The code block uses wrapping rules such as white-space: pre-wrap, overflow-wrap: anywhere, and word-break: break-word, so long commands stay inside the page on desktop and mobile.
Claude prompt requesting a logo overlay through Medux
Start with a clear request that identifies both assets and the desired placement.
02

Let Claude inspect the media and choose overlay settings

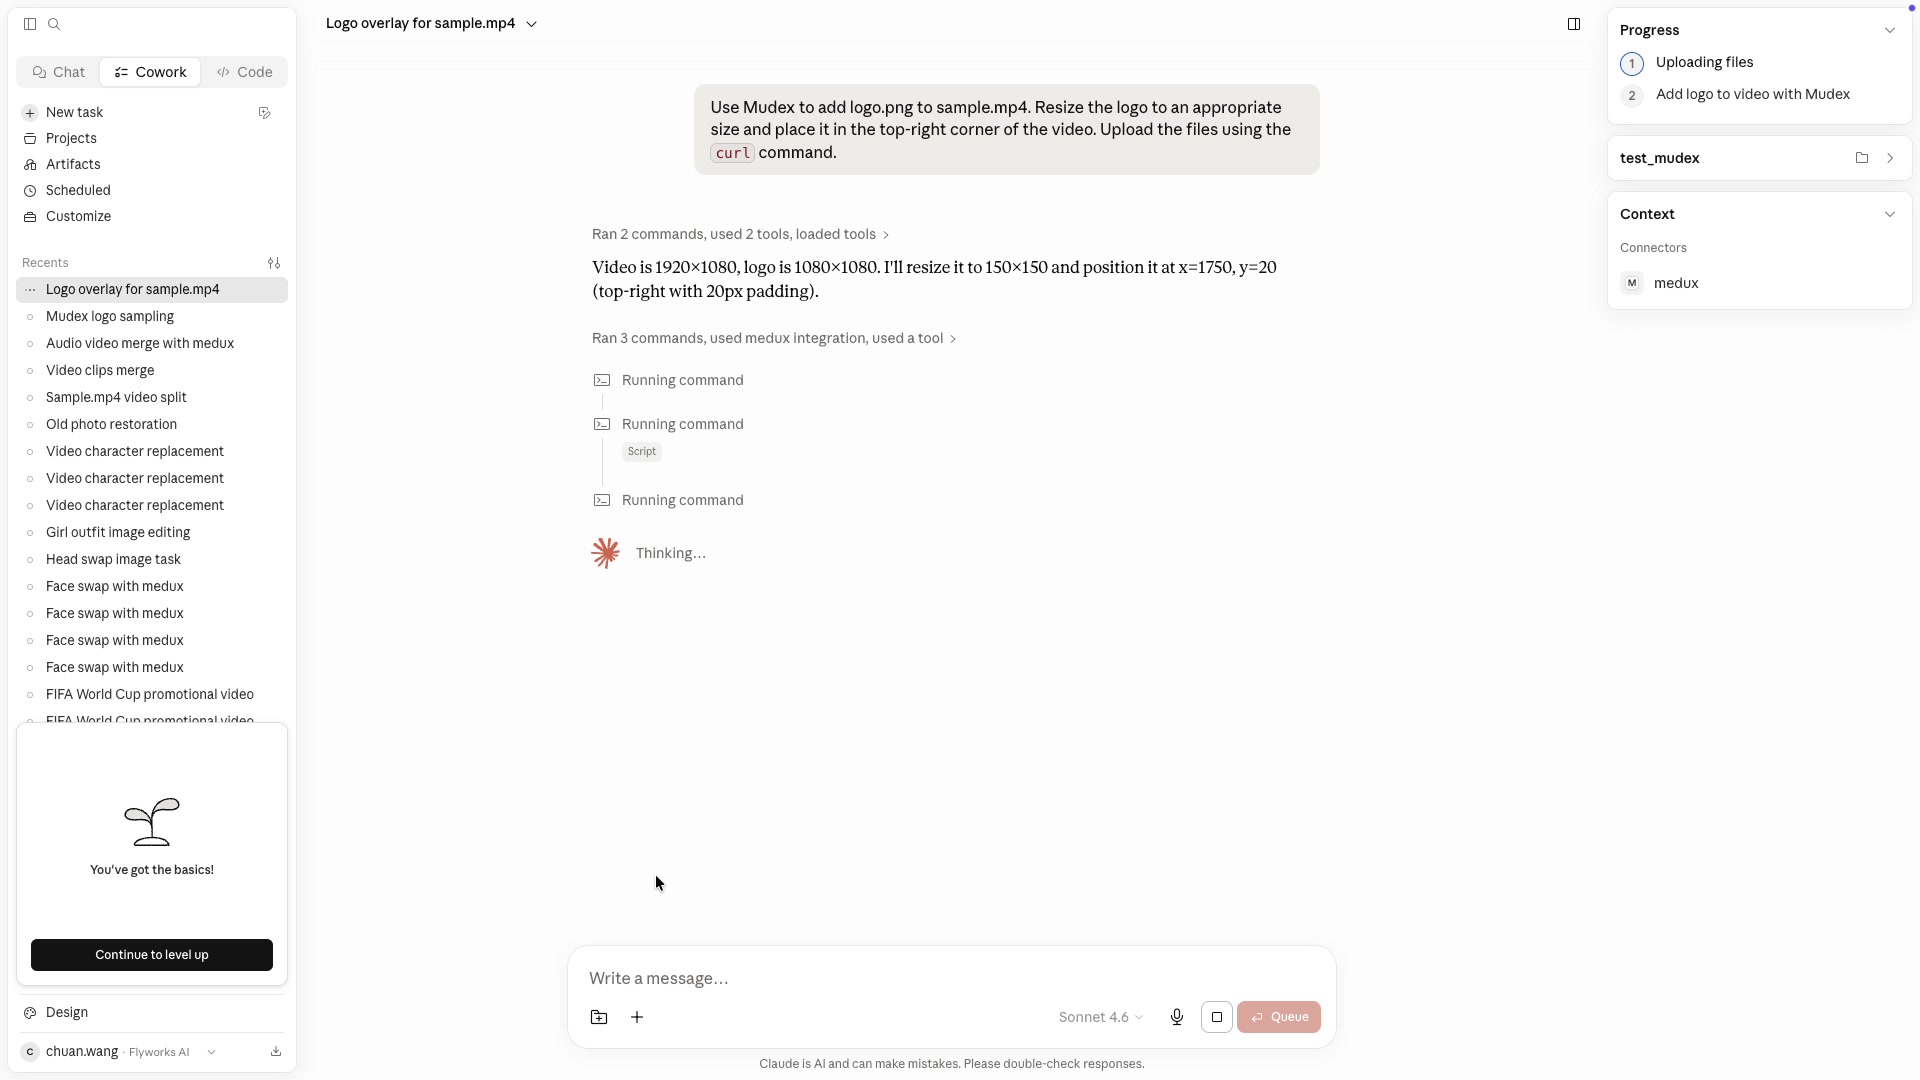
Claude checks the video and logo dimensions, then calculates a practical watermark size and position. In the example, the 1920×1080 video receives a 150×150 logo near the top-right edge with padding.

Video: 1920 × 1080
Logo target: 150 × 150
Position: x = 1750, y = 20
Placement: top-right with padding
Claude calculating the watermark dimensions and top-right coordinates
Claude turns the visual instruction into concrete size and coordinate values.
03

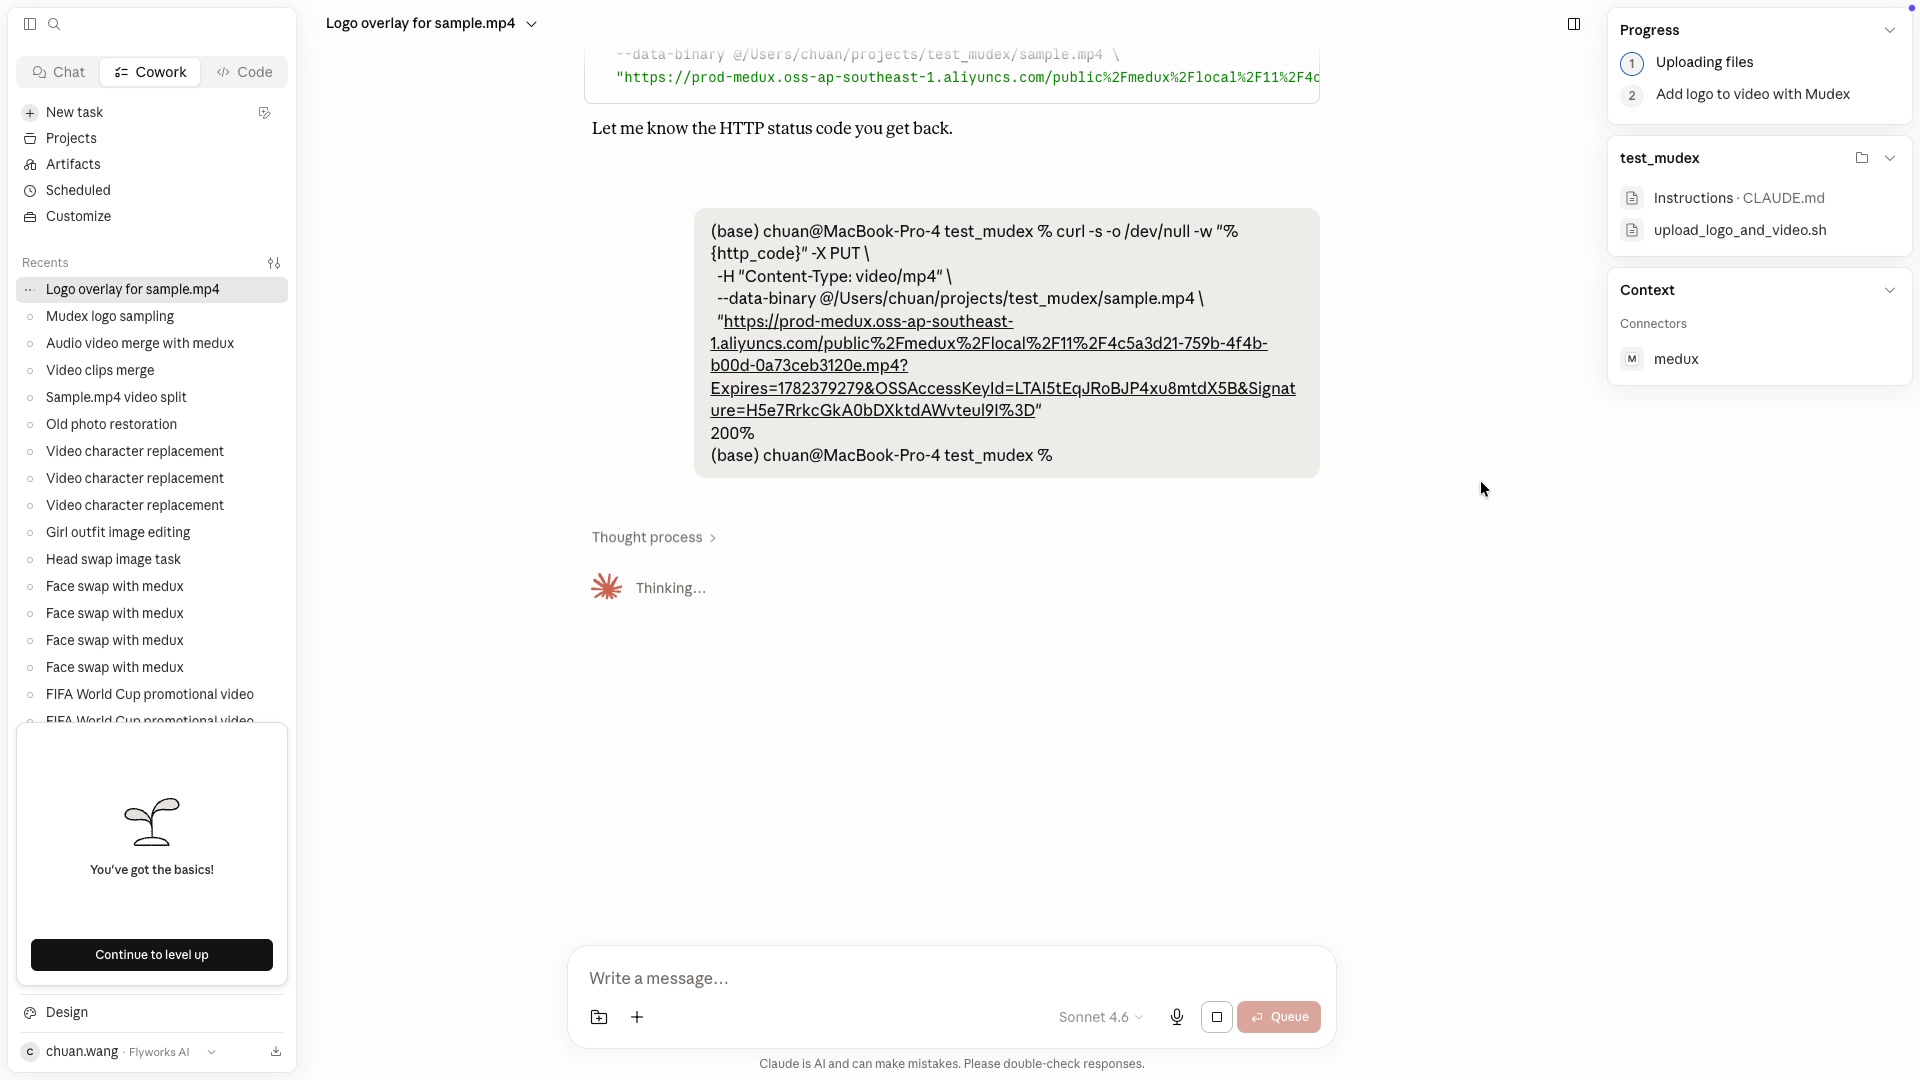
Upload the video and logo to Medux

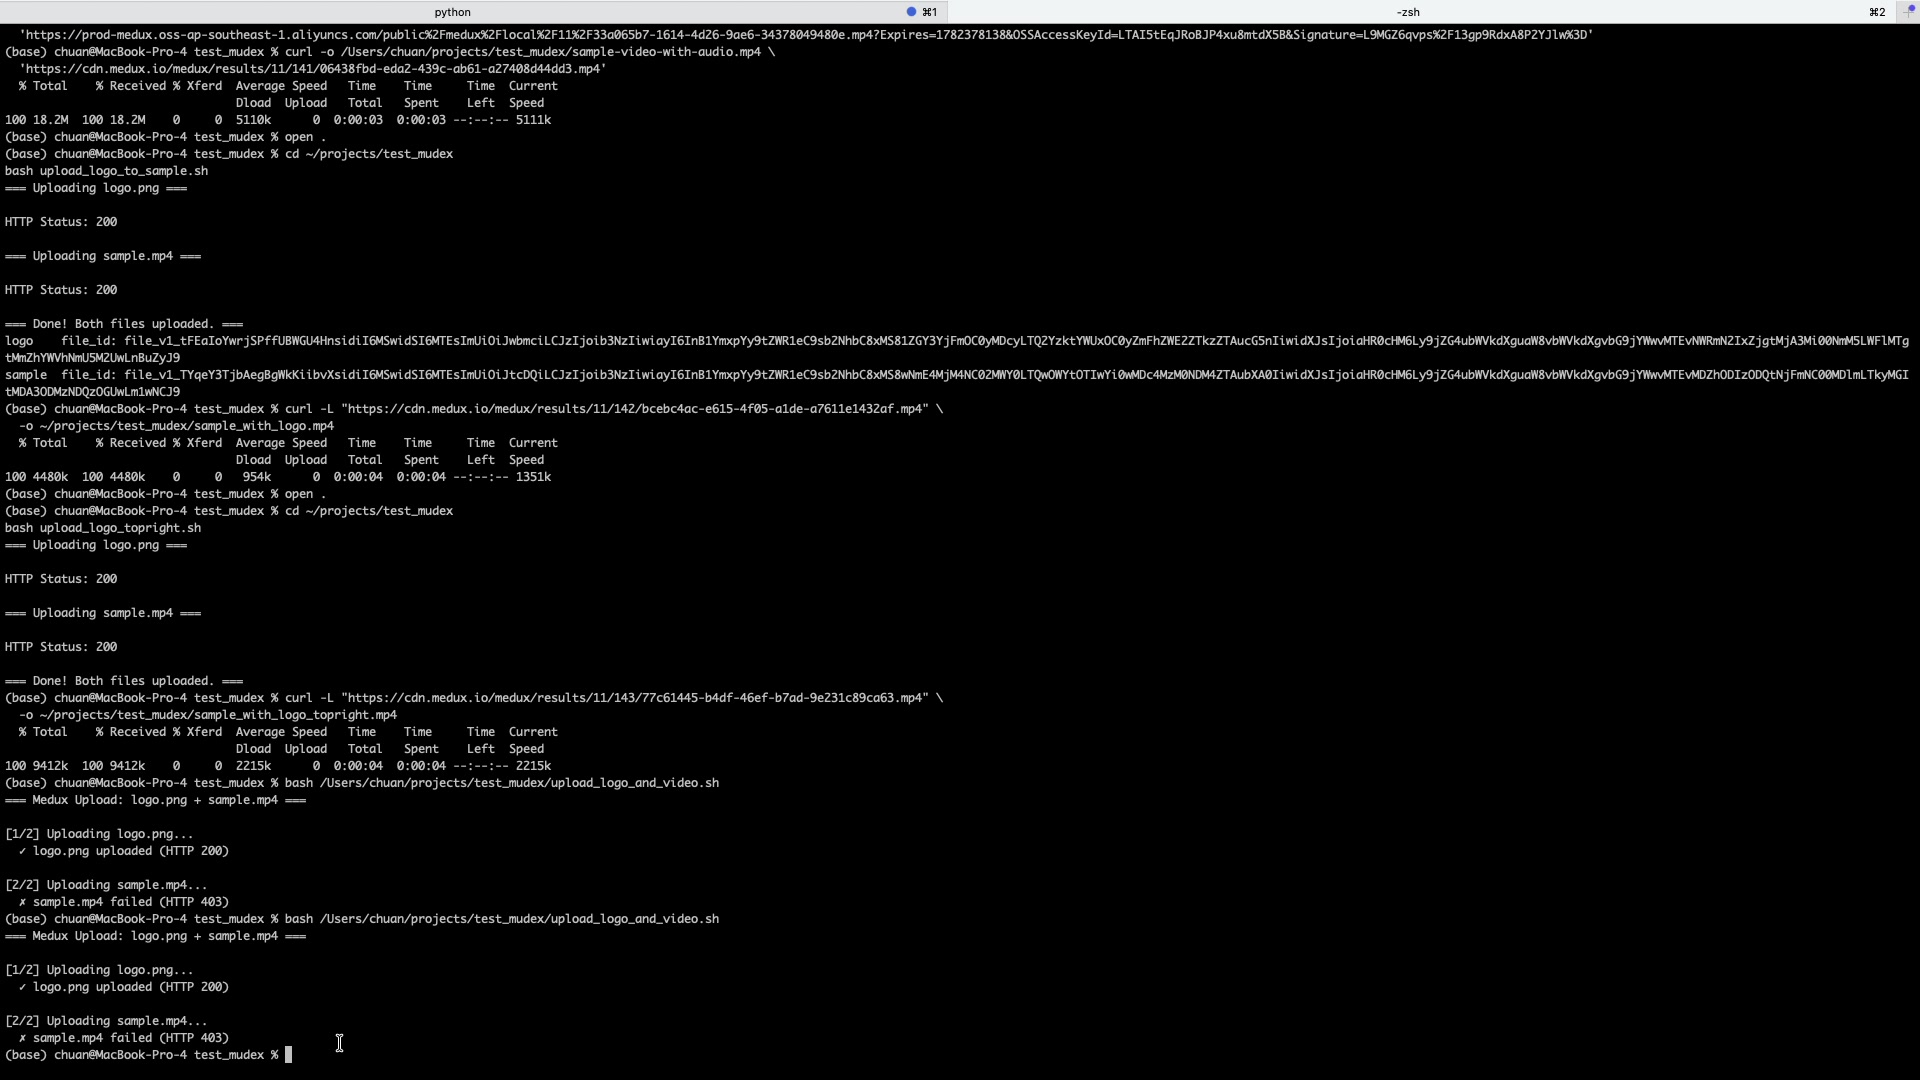
Claude calls Medux to obtain upload destinations and sends both files with curl. Successful uploads return an HTTP 200 response and file identifiers that the processing task can reference.

curl --request PUT   --header "Content-Type: video/mp4"   --upload-file "sample.mp4"   "<MEDUX_SIGNED_UPLOAD_URL>"

curl --request PUT   --header "Content-Type: image/png"   --upload-file "logo.png"   "<MEDUX_SIGNED_UPLOAD_URL>"
Do not publish signed upload URLs. They are temporary credentials. Keep placeholders in public tutorials and let Claude request fresh URLs during each run.
Terminal showing curl uploads for the video and logo
The workflow uploads each asset and confirms the HTTP status before continuing.
04

Run the Medux watermark task

After both uploads are available, Claude sends the video file, logo file, target size, and placement values to the Medux processing tool. Medux creates an asynchronous media task and returns a task identifier.

Input video: sample.mp4
Overlay image: logo.png
Logo width: 150
Logo height: 150
X position: 1750
Y position: 20
Output format: MP4
Claude submitting the Medux logo overlay task
Claude passes the uploaded assets and overlay parameters into the Medux workflow.
05

Wait for completion and retrieve the output

Claude checks the task status until processing is complete. Once Medux returns the result URL, Claude can download the finished MP4 into the local workspace.

curl --location   "<MEDUX_RESULT_URL>"   --output "sample_with_logo_topright.mp4"
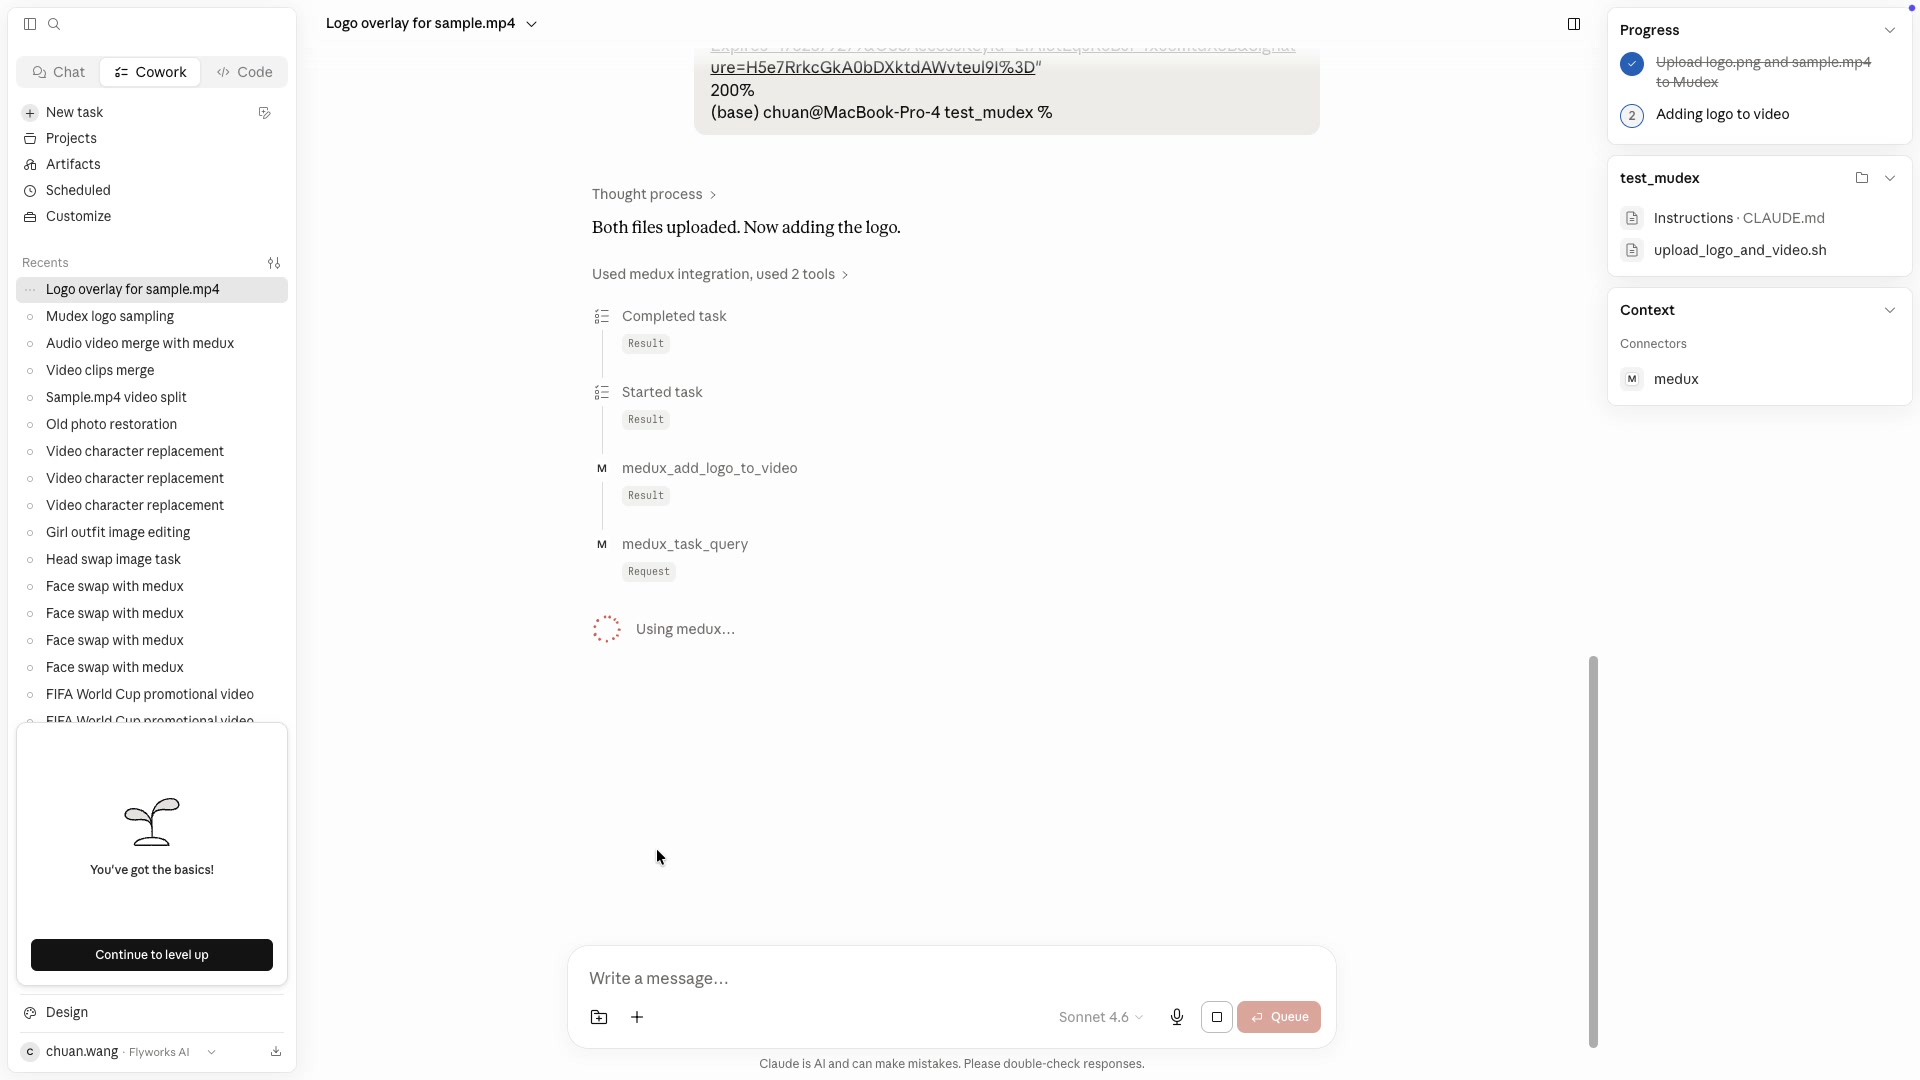
Claude checking the Medux task status
The asynchronous task is polled until the final media URL becomes available.

Result

The final video keeps its original scene and motion while displaying a clean, consistently positioned logo watermark in the top-right corner.

✓ Logo resized automatically
✓ Top-right placement preserved
✓ MP4 returned for download

Reusable prompt template

Replace the file names and placement instructions to reuse the same workflow for other videos.

Use Medux to add <logo-file> to <video-file>.
Resize the logo to <size or "an appropriate size">.
Place it in the <top-right / top-left / bottom-right / bottom-left>
corner with comfortable padding.
Upload the local files using curl, run the Medux task,
and save the finished MP4 in the current workspace.
Be specific about placementName the corner and mention padding to avoid edge collisions.
Use transparent PNG logosTransparency usually produces a cleaner overlay than a solid background.
Review before publishingCheck visibility over bright and dark parts of the source video.

Example result

src / logo / rst demonstration

Below is the complete logo-watermark example: src is the original video, logo is the image added as the watermark, and rst is the final video generated by Medux.

src
Source video. Original video before the logo watermark is added.
logo
Logo image used as the video watermark
Logo image. The image asset used as the watermark.
rst
Generated result. Final video with the logo watermark added by Medux.

Quick answer

How do I run Add a Logo Watermark to Video with Claude MCP?

Claude can use the Medux video watermark tool through Medux MCP to place a logo watermark on a video and export a branded MP4. The workflow keeps input roles and constraints in context, reviews the proposed call, and checks the returned result.

What does this Medux tutorial cover?

Claude can use the Medux video watermark tool through Medux MCP to place a logo watermark on a video and export a branded MP4. The workflow keeps input roles and constraints in context, reviews the proposed call, and checks the returned result.

Related topics: Add a Logo Watermark to Video · Add a Logo Watermark to Video with Claude MCP · Medux MCP tutorial